Making our own Automatons!
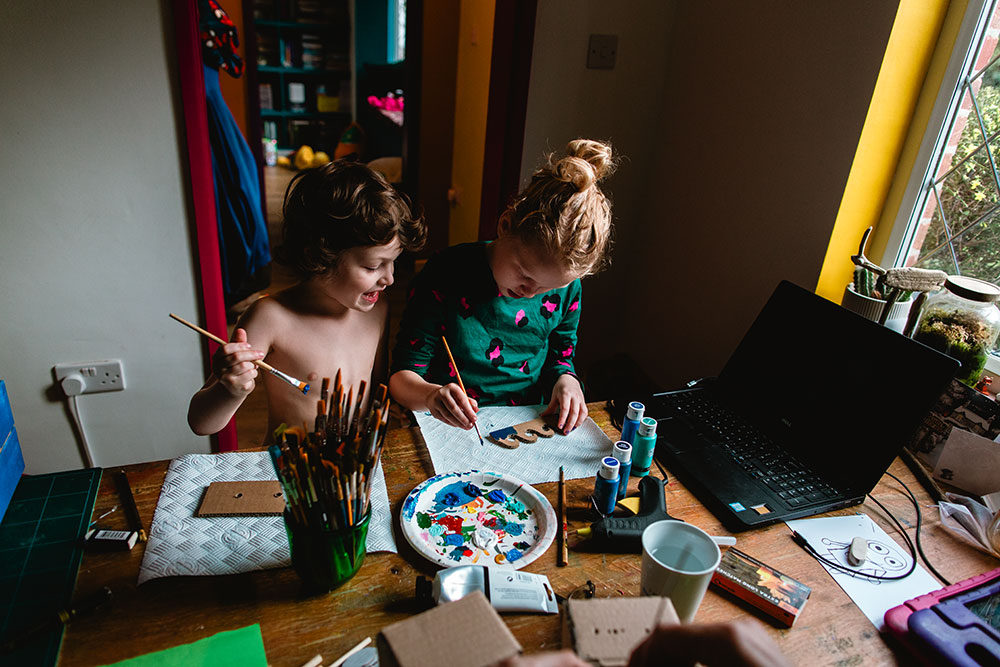
Towards the end of last year we visited the mechanical, art & design museum (MAD museum) in Stratford-Upon-Avon and were blown away by all of the incredible Automatons on display. It is a wonderful little place that celebrates creativity in the most amazing ways. Afterwards we had automatons on our brain and the kids really wanted to have a go at making some of our own from scratch along with an amazing kit that we bought in the museum's gift shop (you can purchase them online from their website).


So over the winter holidays we spent a lot of our time doing just that, we discovered it was a lot harder than it looks but we had a really great time figuring out how to create some. The kids and I used pinterest as our inspiration and tried to find very simple ones that we liked and then used the image as a guide. I love how both me and Kevin take the lead at different times with all the projects we do and this time it was Kevin's turn.
We ended up making three different types from scratch & I've done my best to try to share how we went about creating them through photos but since we just kind of figured it out as we went along they may not be the best instructions! But then that's a great part of learning too and it allowed the kids to get first hand experience of applying the engineering method (the first one is a more detailed post and the last two unfortunately I don't really have great instructions for since they were just kind of thrown together through lots of trial and error!).
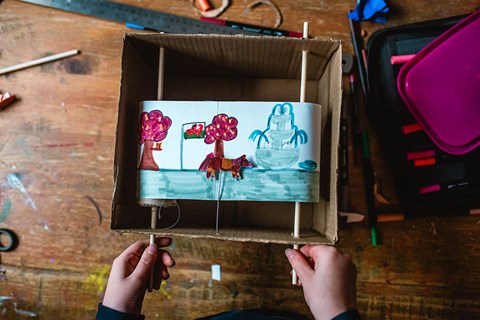
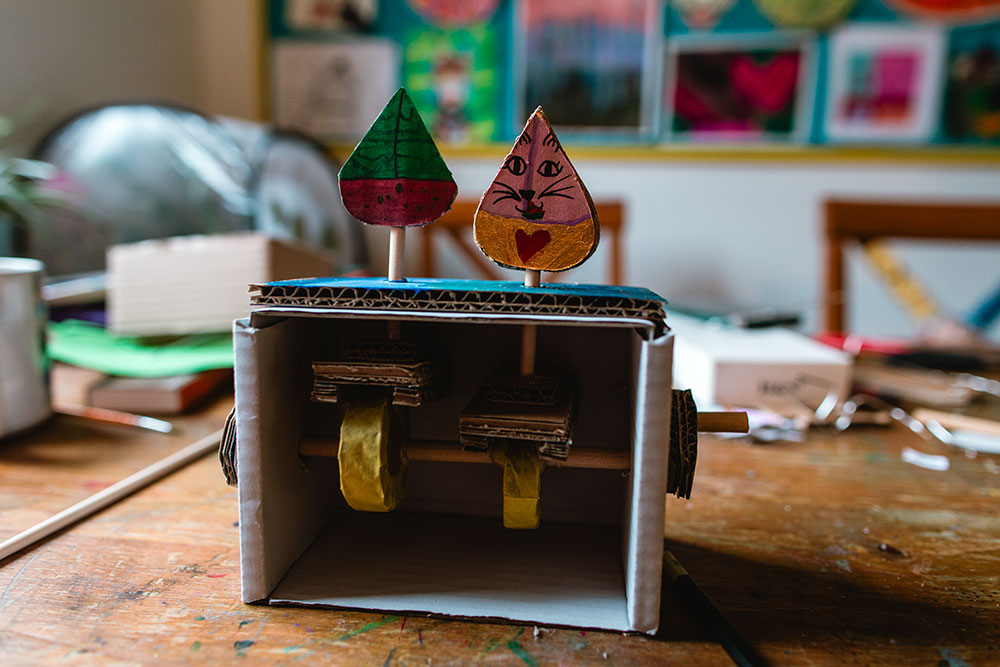
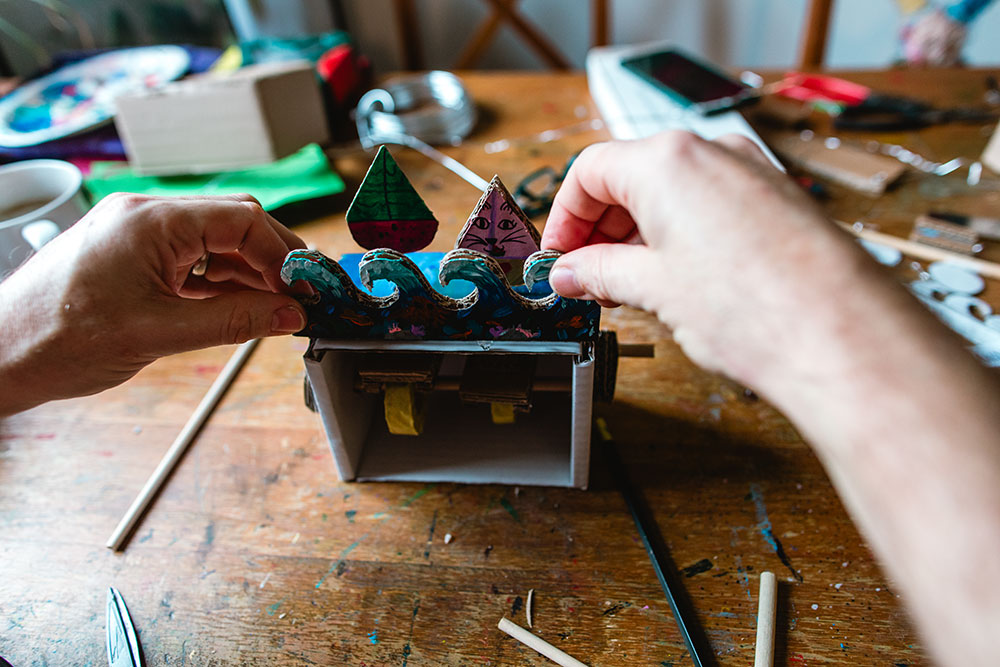
Boats In The Ocean Automaton
Supplies needed:
- Cardboard box (we used one of these)
- Wooden dowels
- Cardboard
- Acrylic paints
- Masking Knife
- Scalpel/Scissors
- Hot Glue Gun
How we went about it:
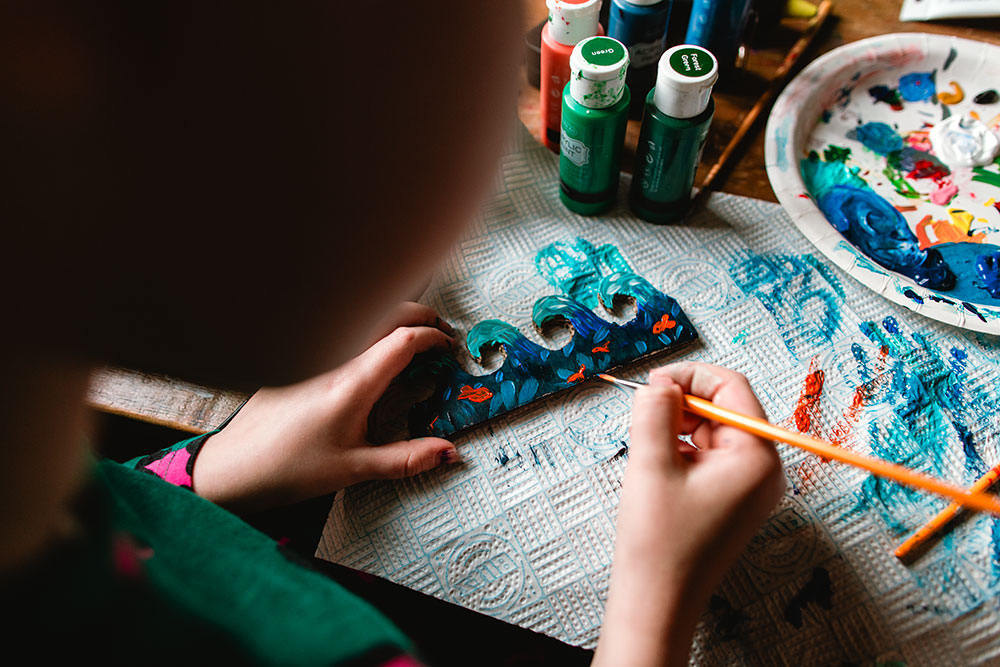
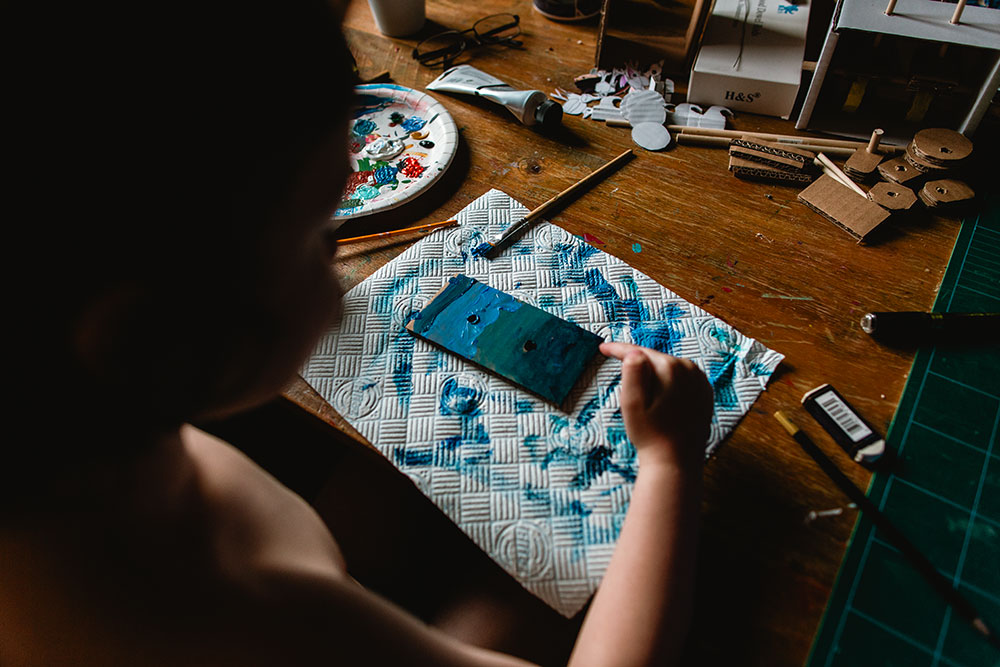
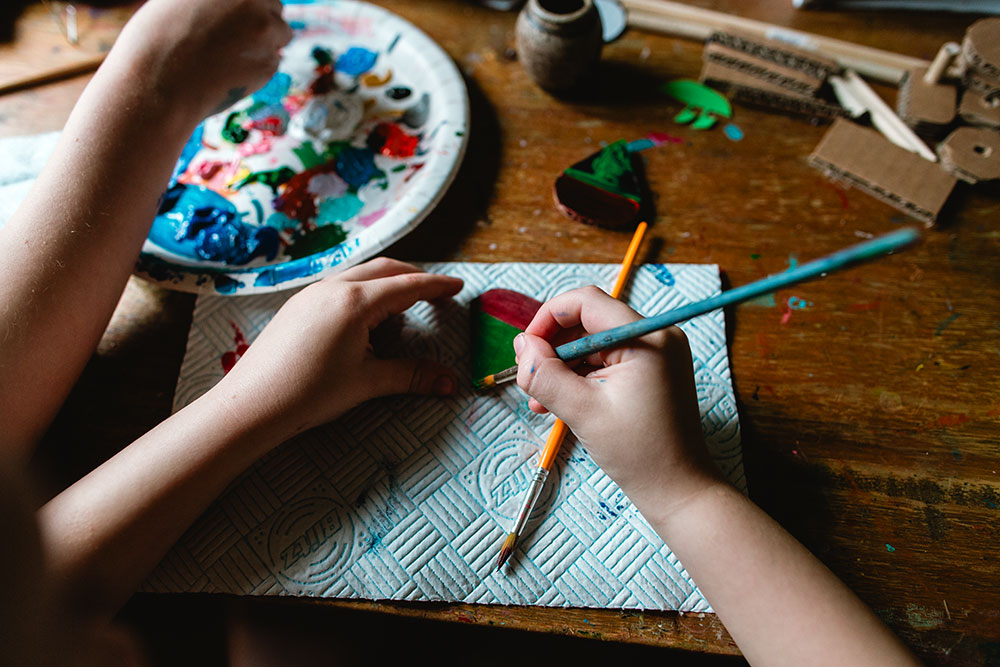
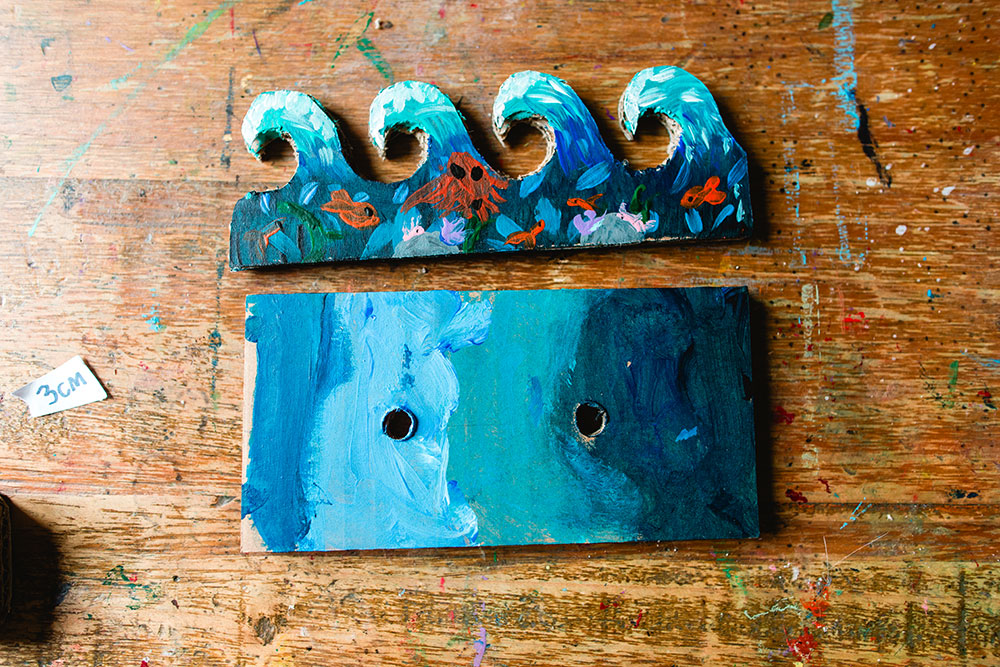
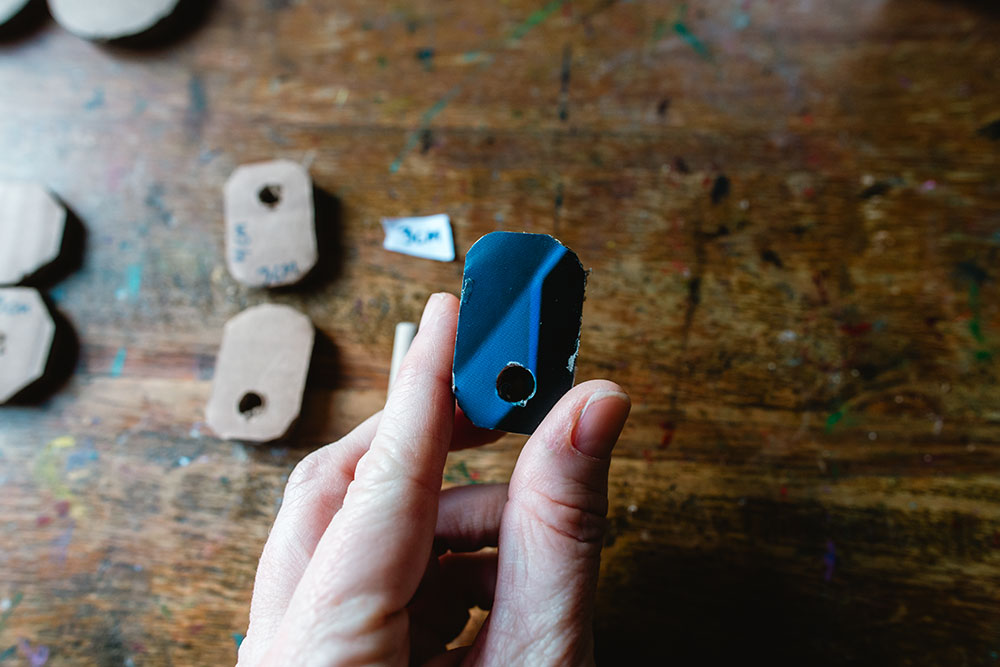
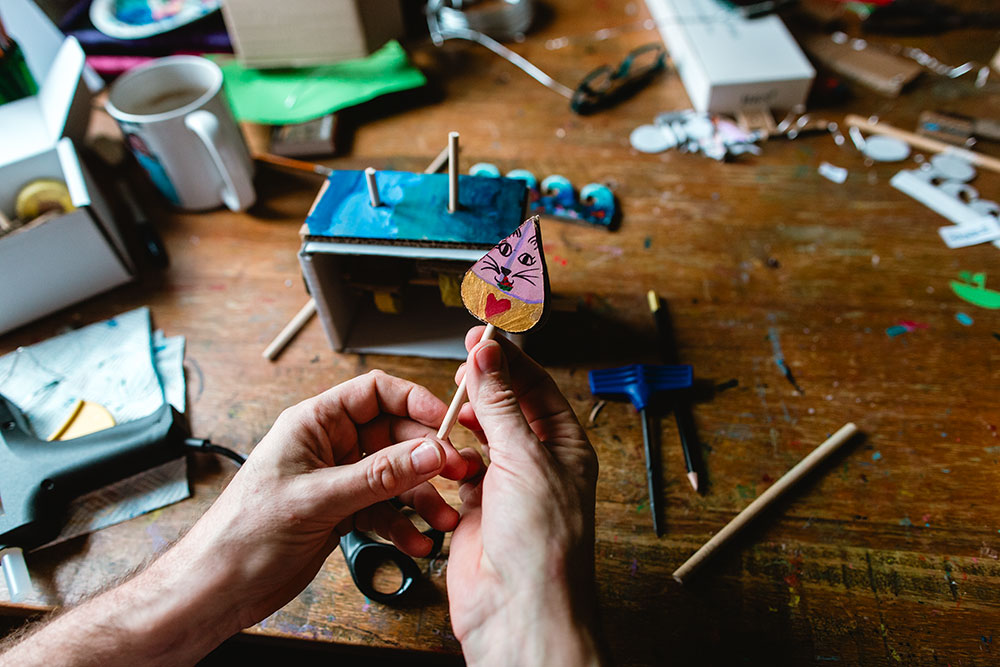
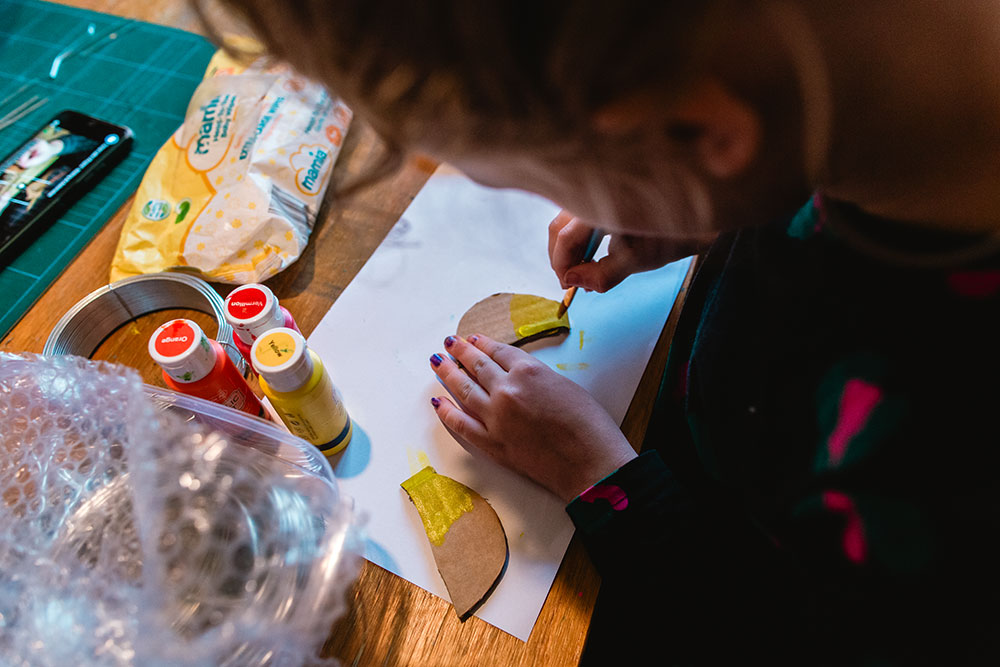
- First we created the waves by measuring some cardboard to the longest side of the box and then drawing an outline and cutting it out. We also cut out a rectangular base (the ocean) also the same length of the waves and slightly less of the width of the box, and drew some boat shapes to the size we wanted and also cut them out. Then we painted everything. Nixie did the waves, Forrest did the base and they each did a boat. Make two holes into the base just far enough apart so that your boats don't touch each other, make the same holes into the top of your box too.
- Next we cut out all the rest of the shapes we needed.
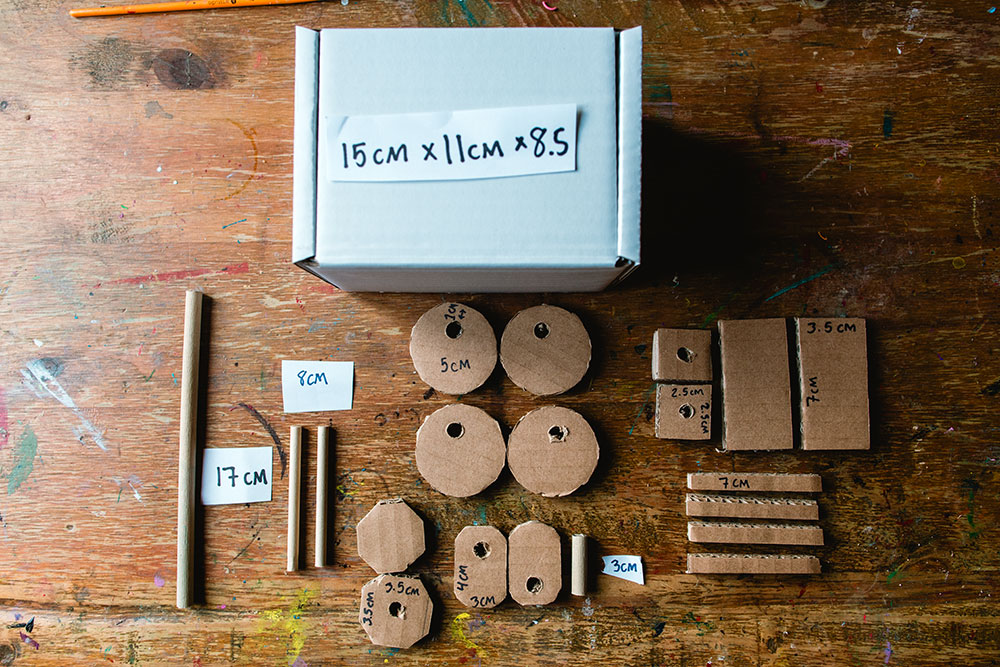
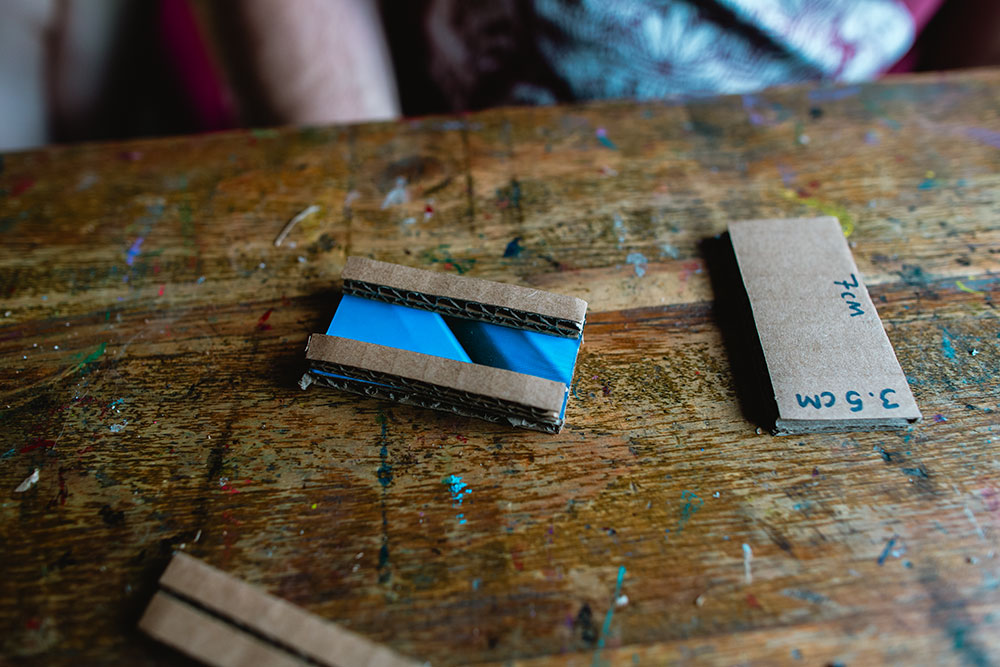
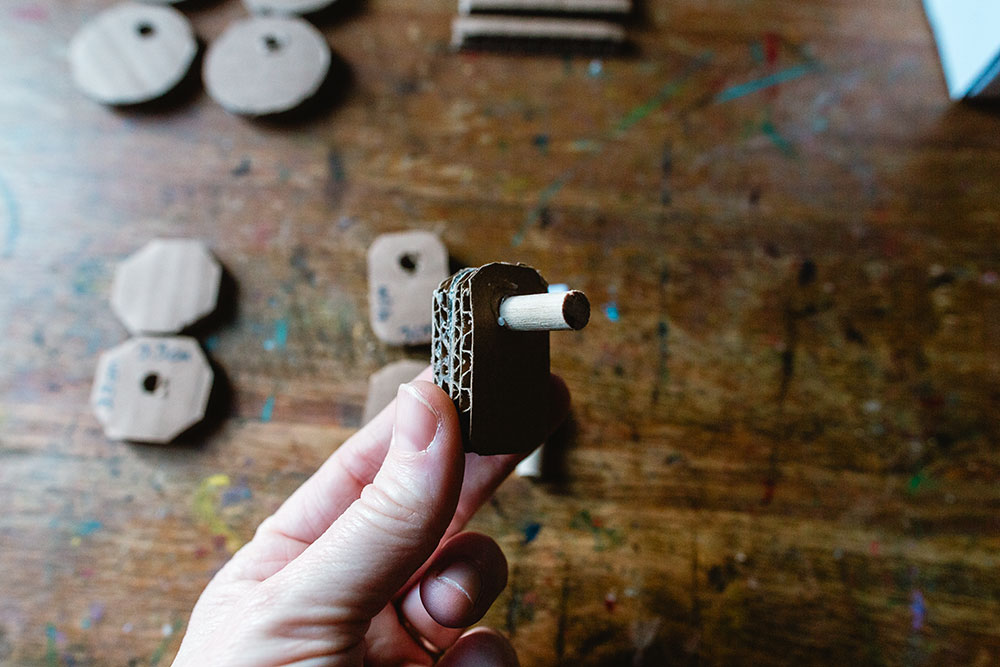
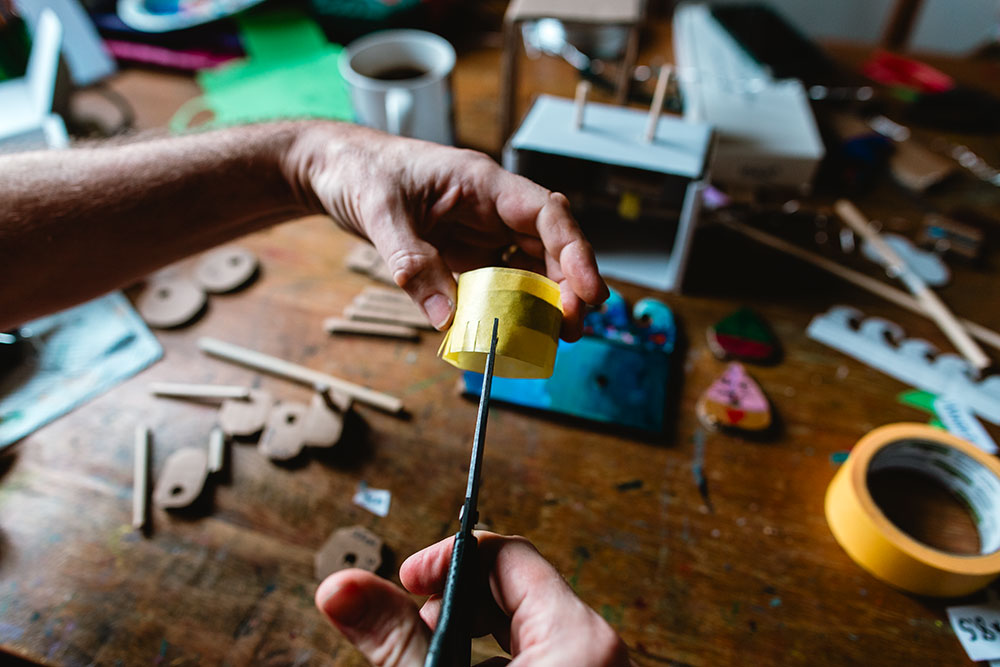
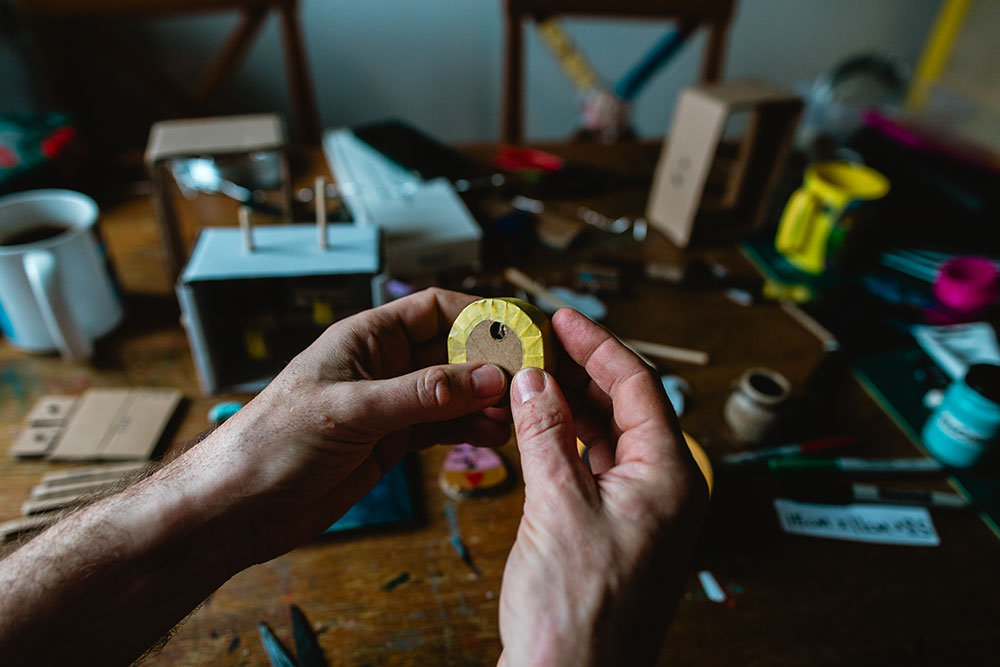
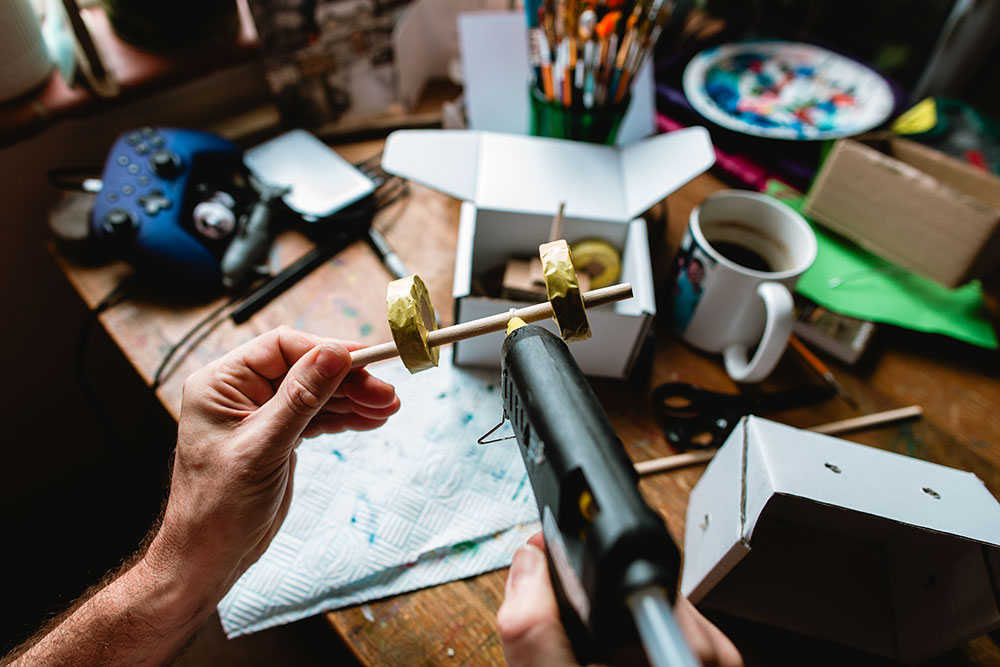
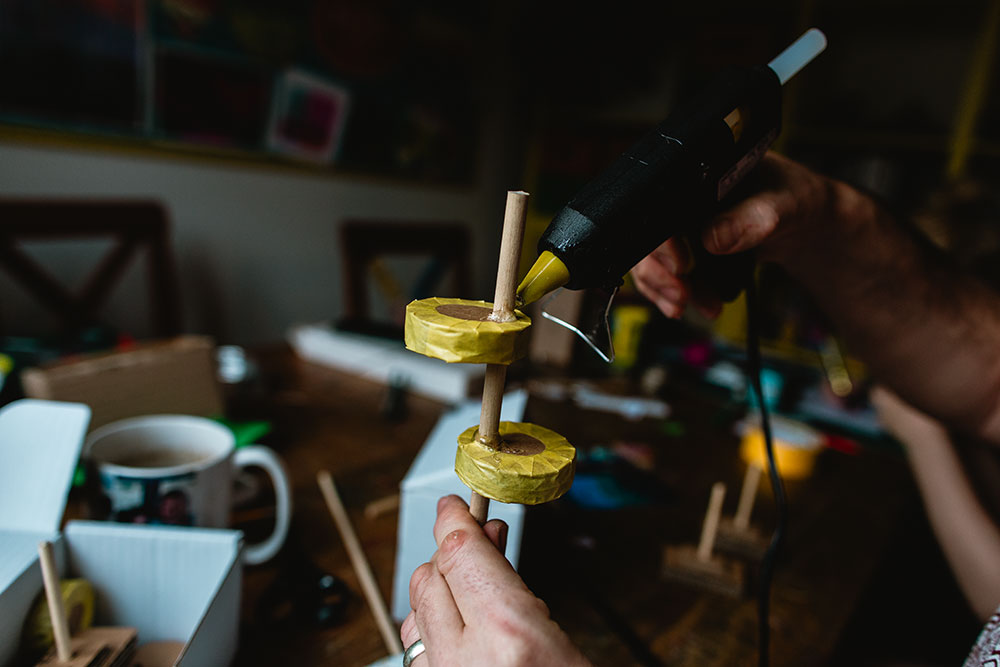
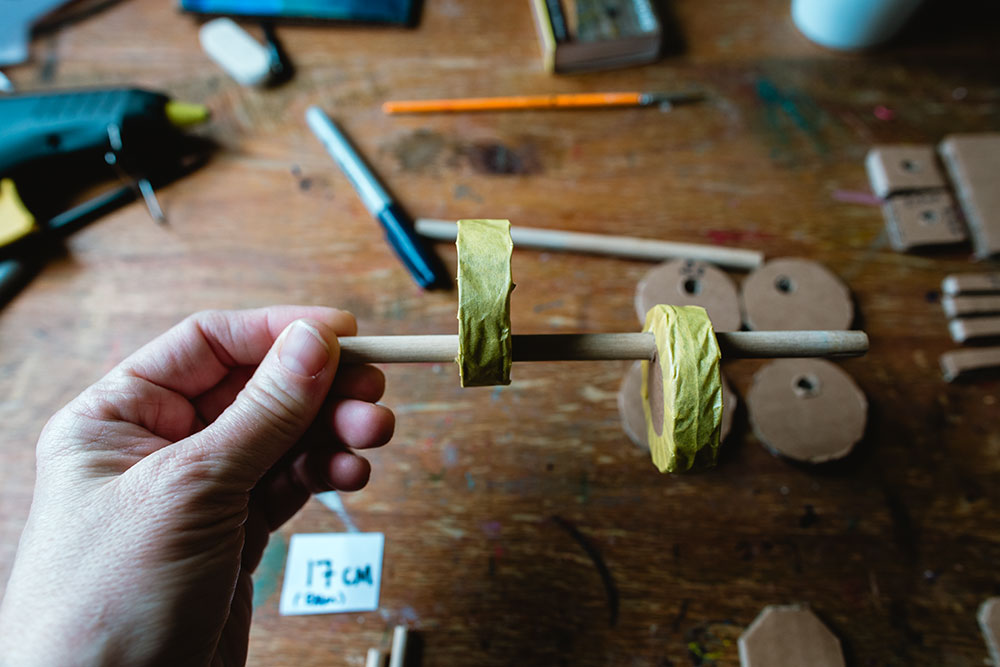
- We began with making the "feet". Glue your 7cm strips to each side of your rectangles. Flip it over and glue you square with the hole in the centre on it in the middle of your rectangle. Then glue your 8cm wooden dowel into the hole. Repeat this process twice.
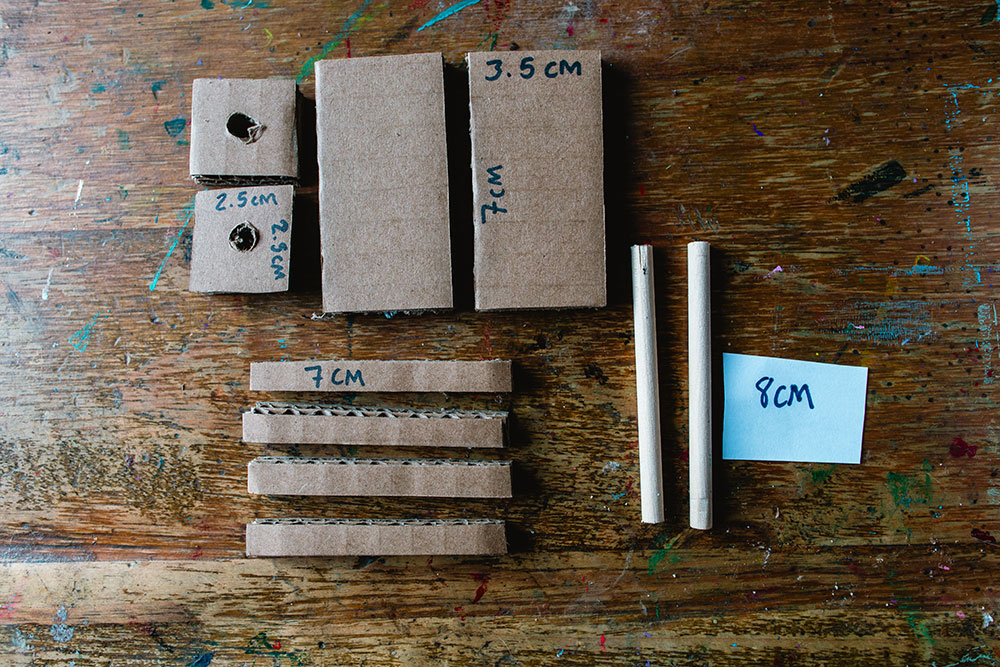
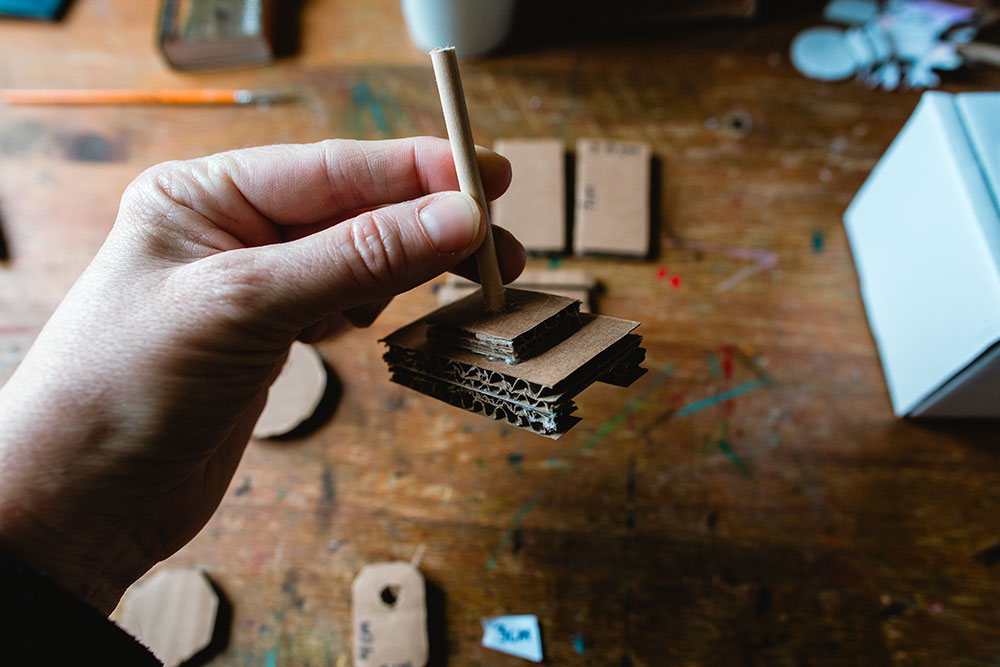
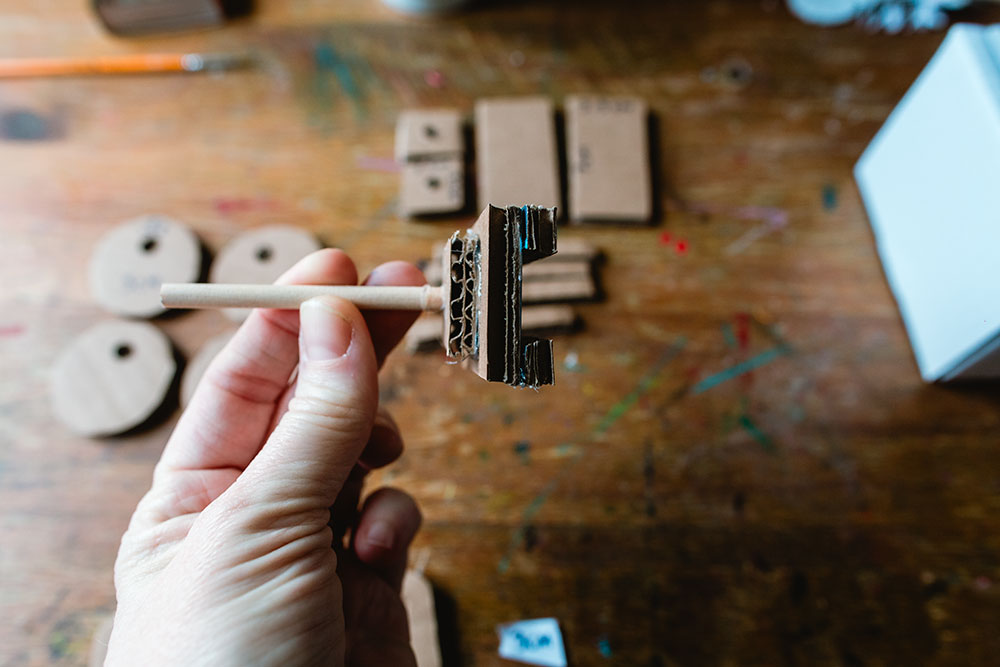
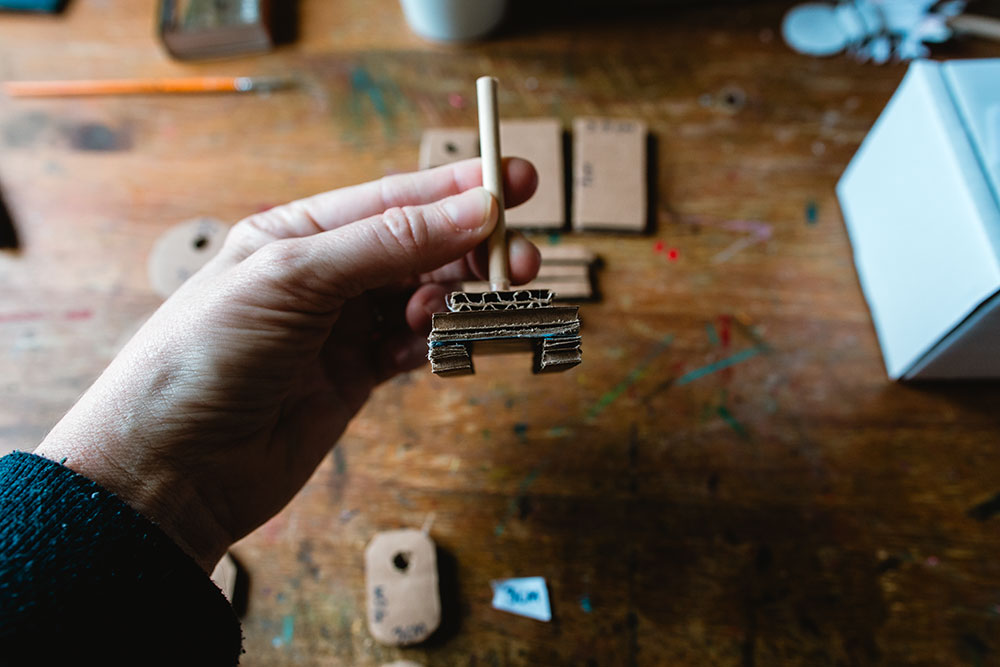
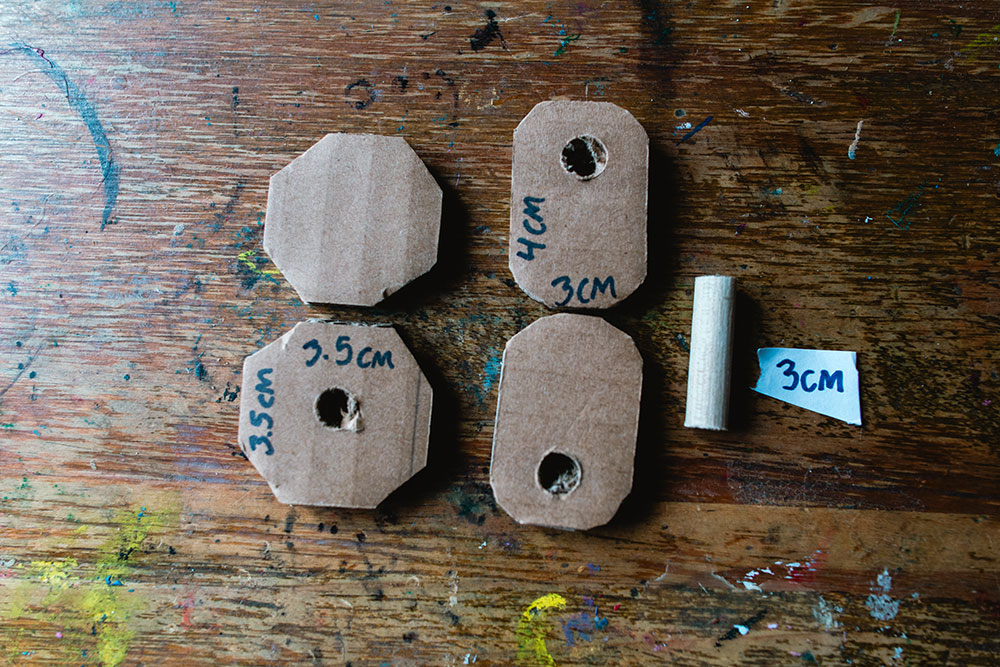
- Then we made our handle. First we glued the two longer 4x3 pieces together with the holes on the opposite ends. These holes didn't go all the way through. Then we attached the small 3cm wooden dowels and glued it in place. The other hole is where the longer dowel will be attached. Don't glue that bit until the end.
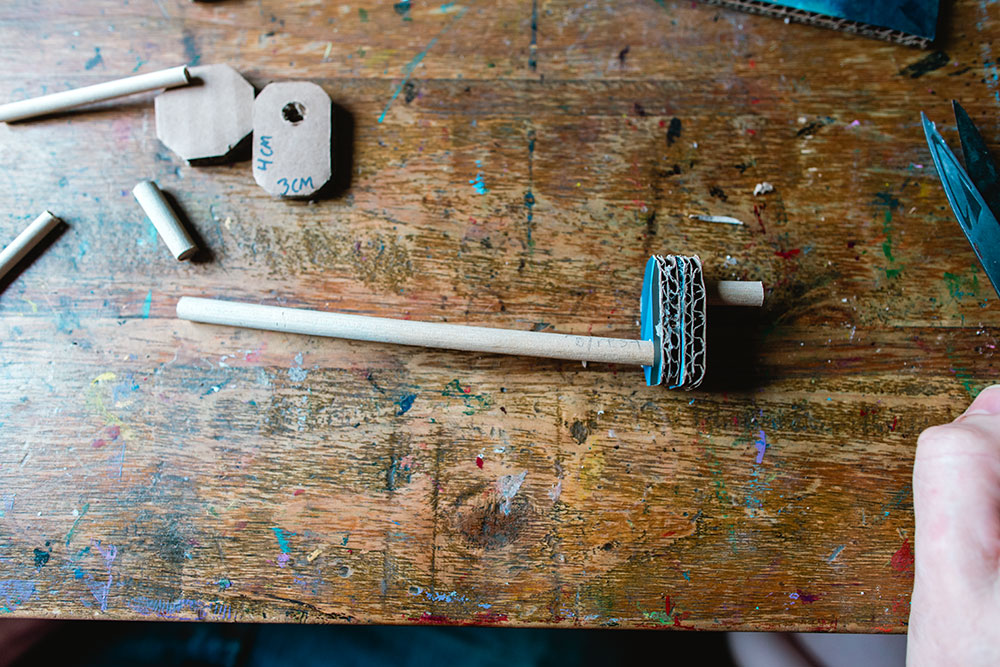
- Then we made our wheels. First glue two of your circles together (x2) making sure the holes line up. Also when making the holes make sure they are not centred and about 1cm from the edge. Next, roll your wheels onto a strip of masking tape until the whole wheel is wrapped around then you want to cut some slits into the tape so that you are able to make the wheel as smooth as possible. Next you want to glue your wheels onto your longest dowel and make sure that they line up with the holes at the top of your box. Also make sure that one of your wheels is towards the top of your box and the other is towards the bottom. It's a bit tricky gluing the wheels onto the dowel so first place a little glue where you want it to be then push the wheel into that spot.


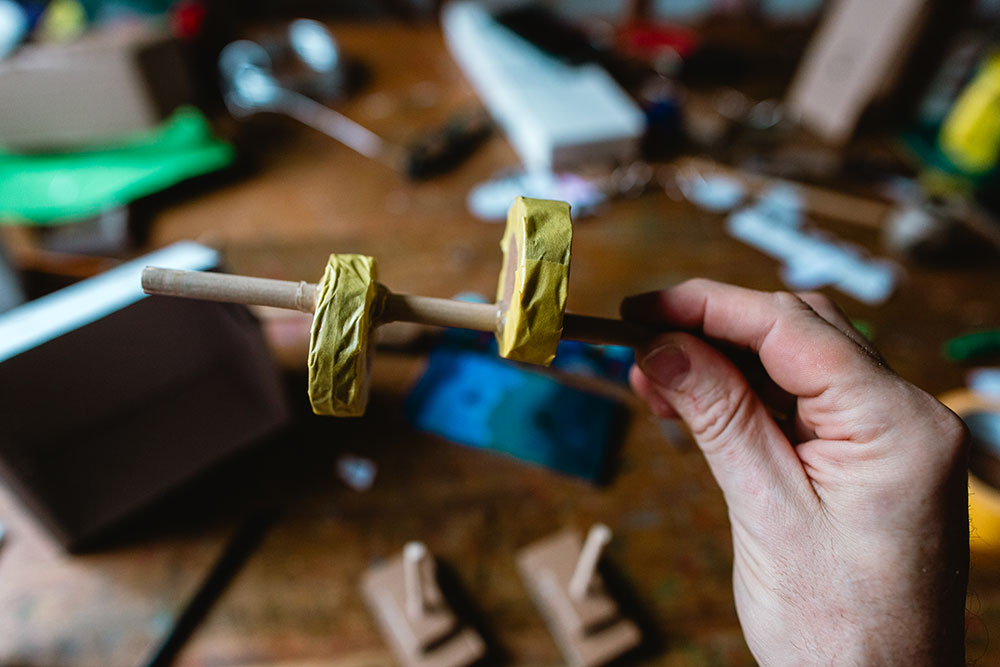
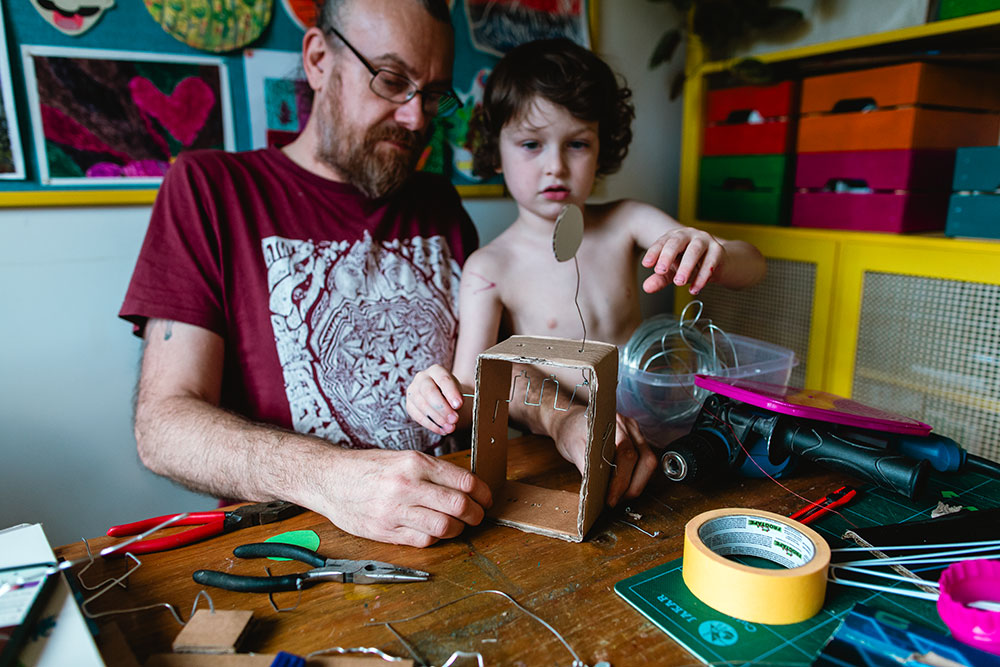
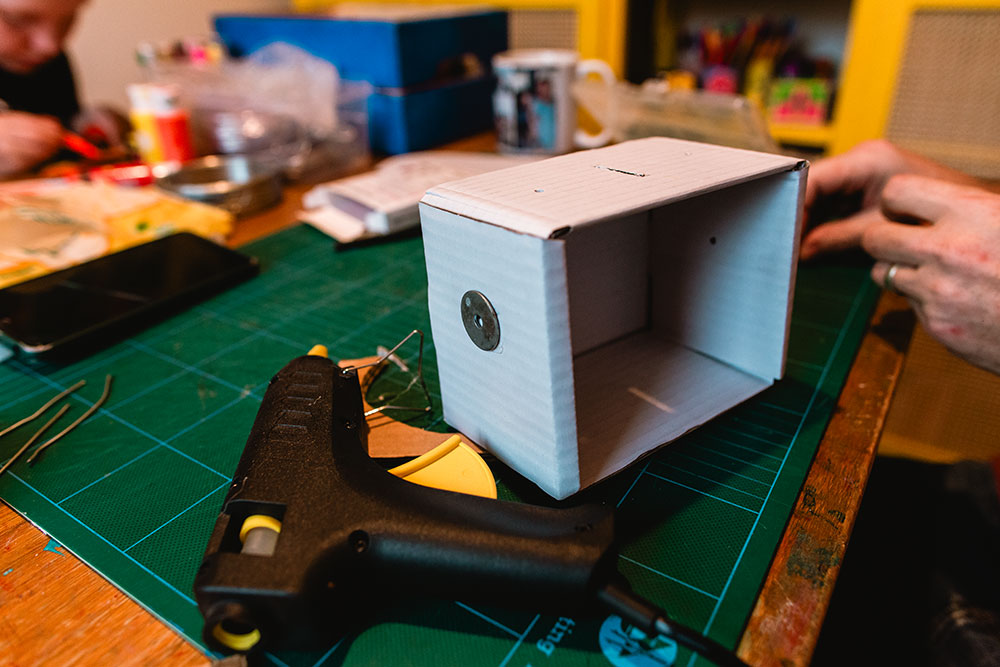
- Next you want to put your pieces together into the box.
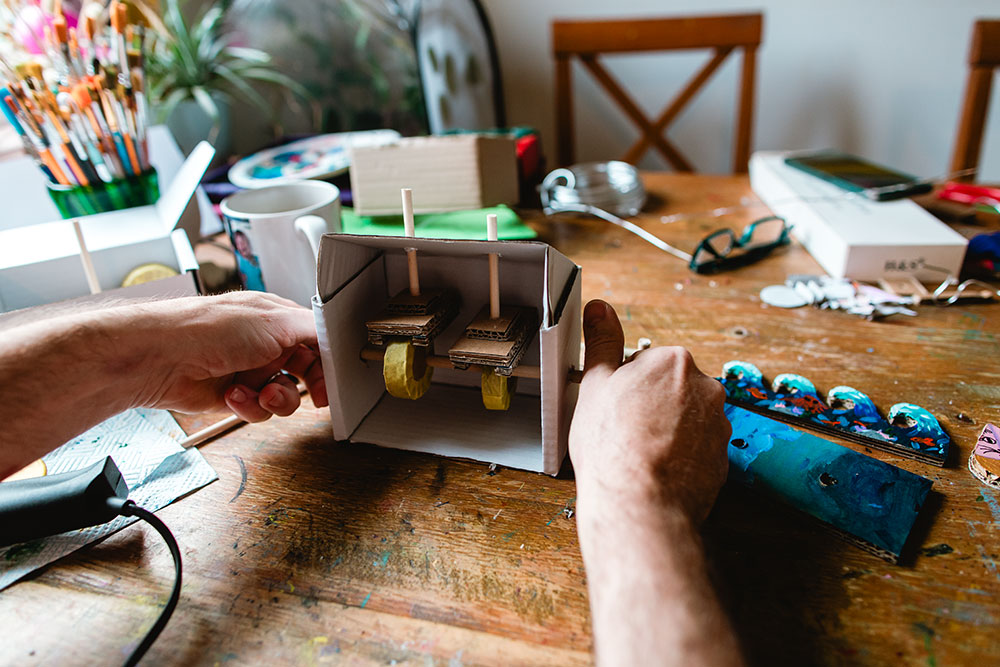
- Then glue on the base and then push the boats onto the dowels of the feet (we used a little glue here to help make it sturdier). Then glue your wave onto your base. Finally you can glue your handle onto your dowel.
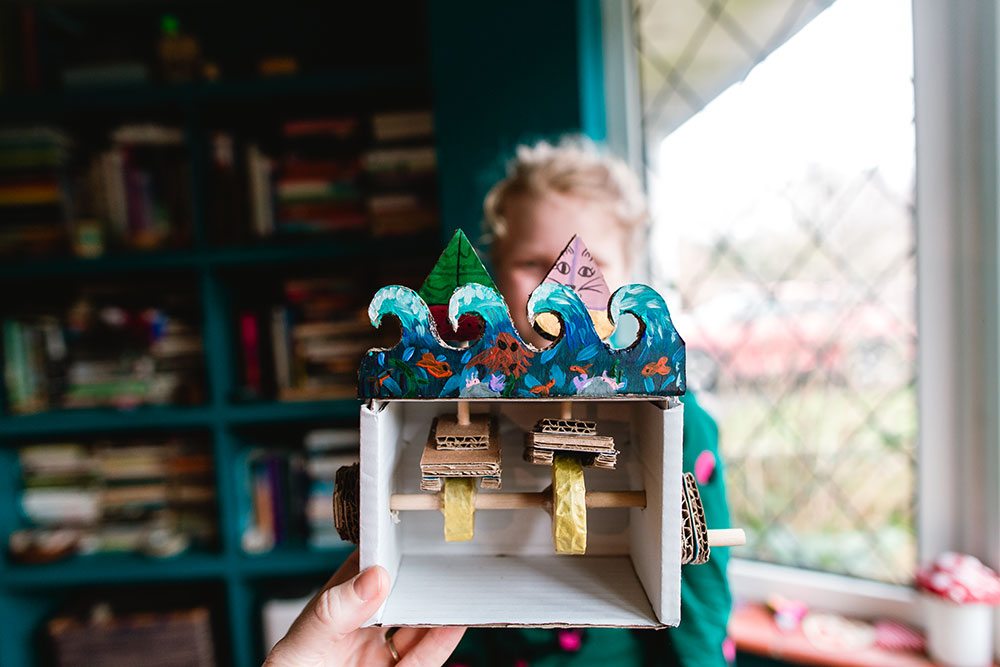
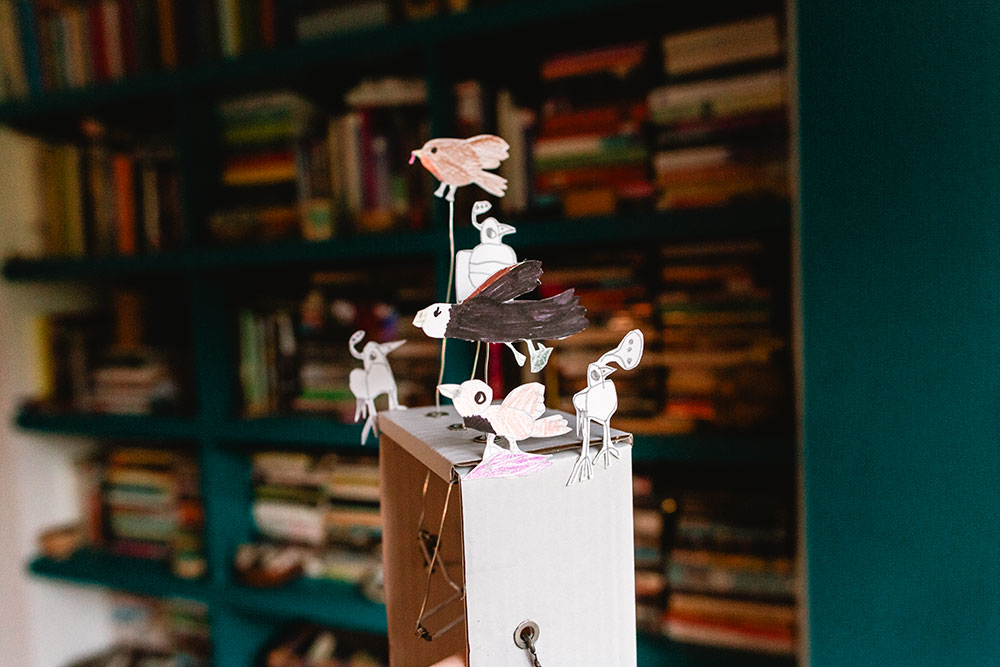
We also experimented with two other designs both inspired by our love for birds.
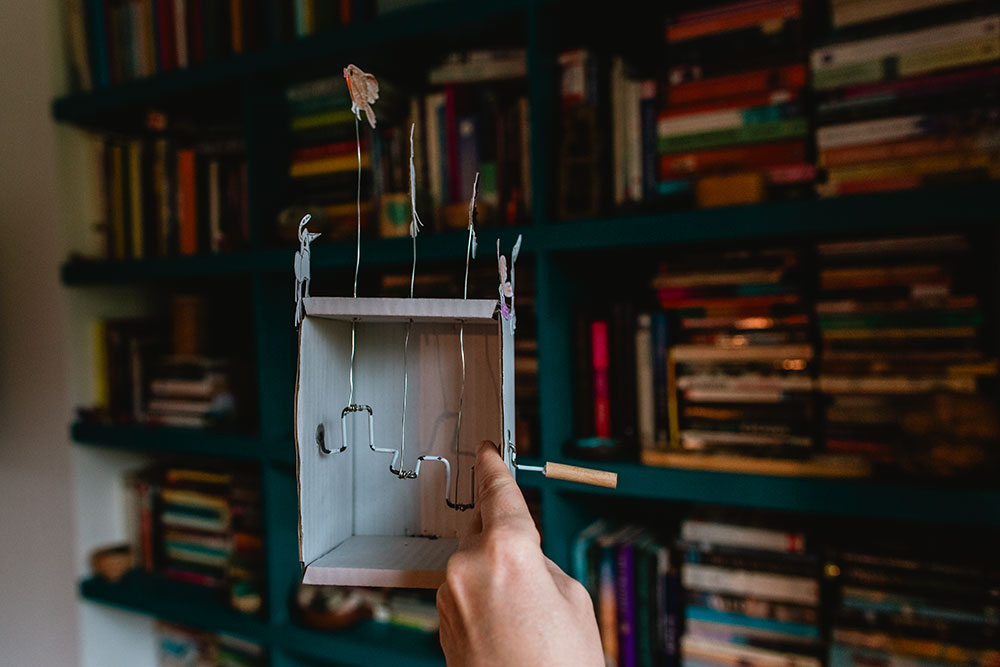
These next two were created using just wires as the mechanical part which seemed easy enough but you'd be surprised with how many times it took us to make it work!
A Flock of Flying Birds Automaton
supplies needed:
- Same cardboard box as above
- Strong wire. We used this wire (we tried with coat hangers but it was too hard to bend and would snap and others we found were too soft and too bendy.)
- Wire cutters/Scissors
- Cardstock
- Glue
- Washers (not needed but we found that they helped with not ripping the cardboard after repeated friction)
- a bit of dowel for the handle (but not necessary)
How we made them:
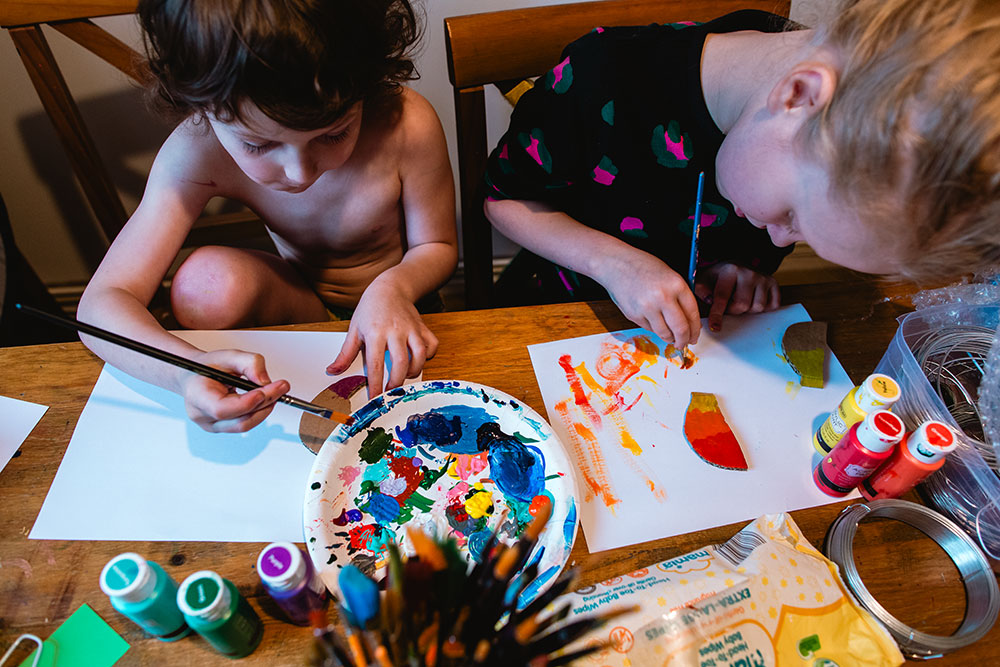
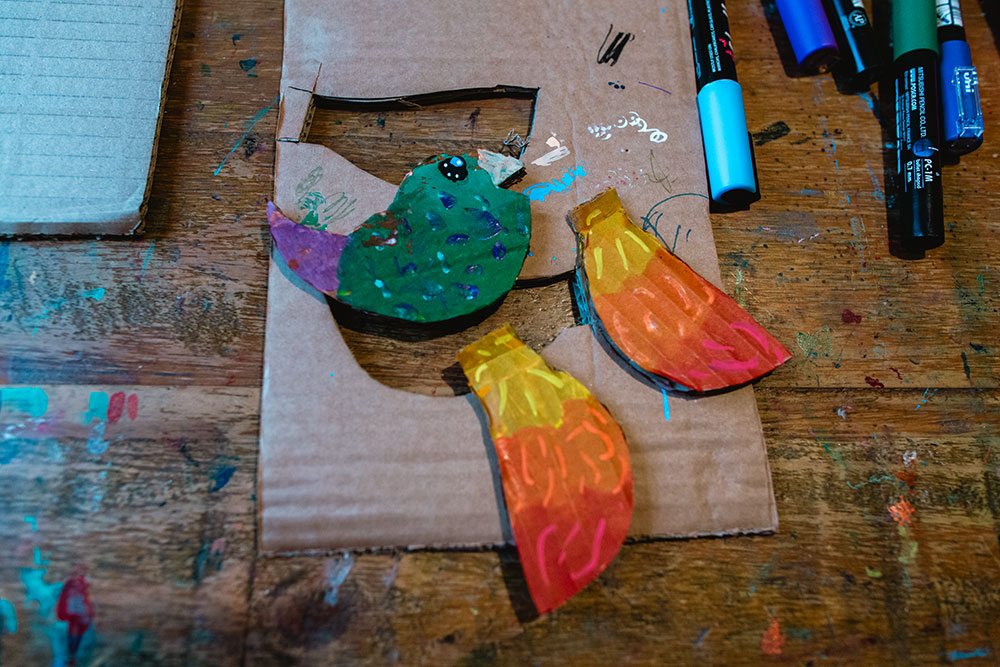
- First the kids made their birds. I love how Forrest's penguins had jet packs! Once they were finished they were cut out.
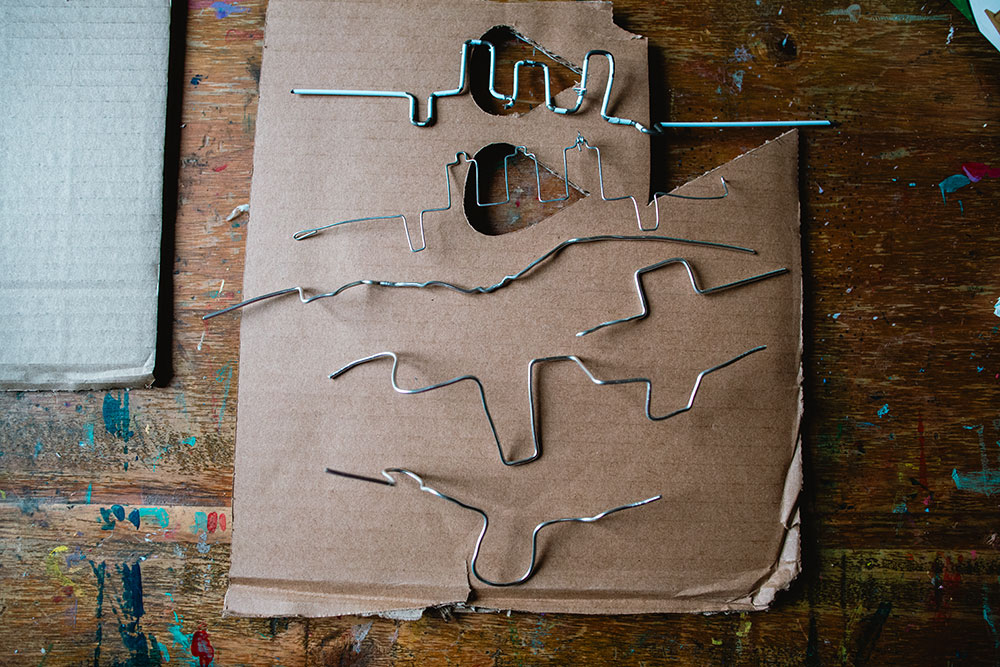
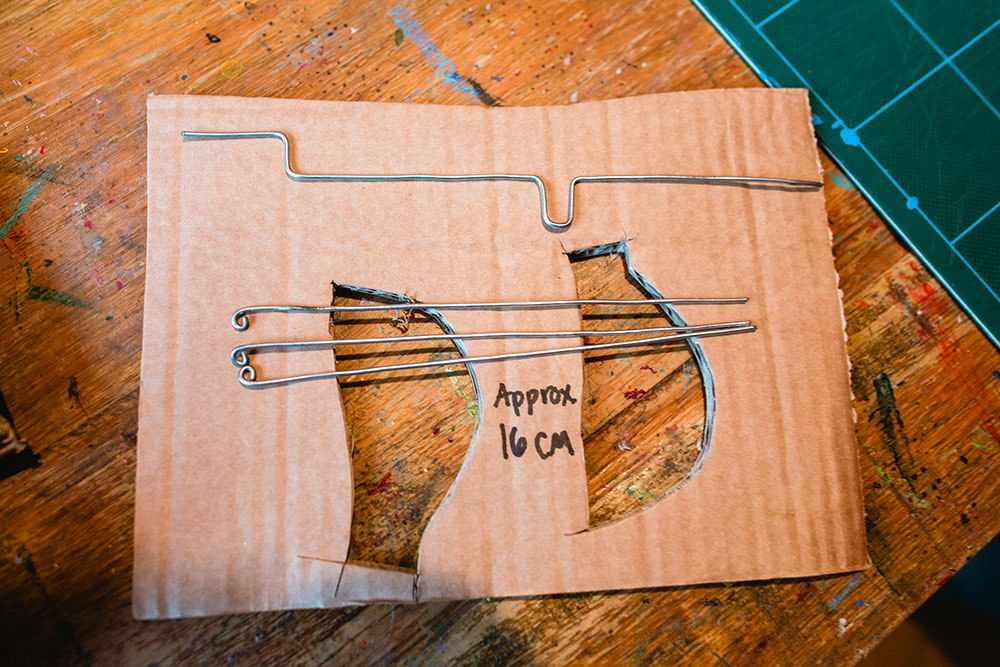
- Then we spent ages figuring out the best way to bend the wires. As you can see below it took many tries! In the end we bent the wire like you see in the second image and then attached wires from each bend and attached them to three of the birds. The washers were added to the holes in the box to stop the box from ripping)
Flying Bird
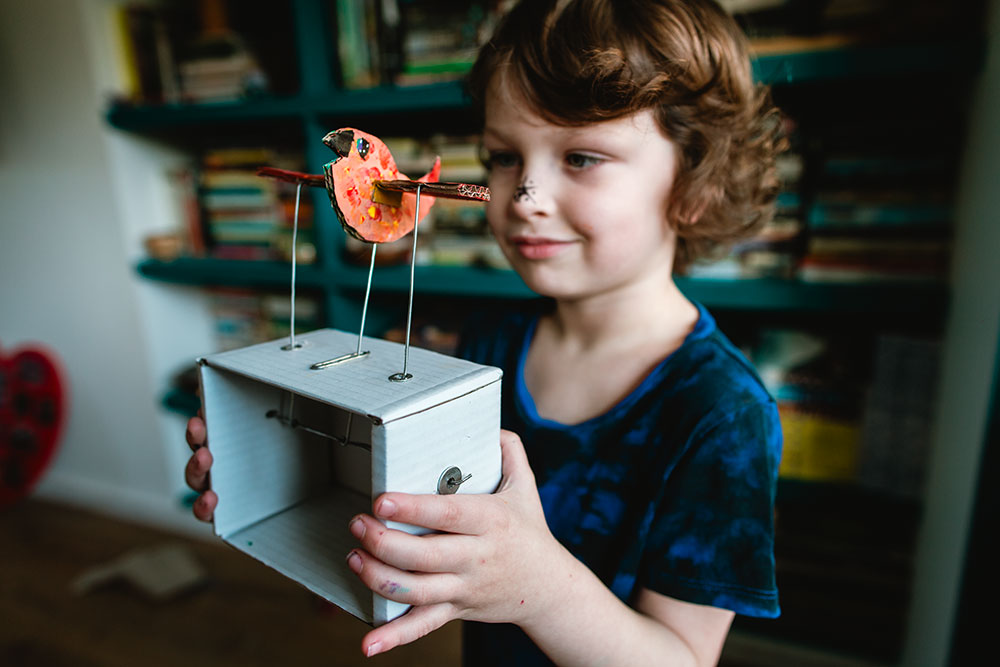
This was the last one we tried and I really love this one. This was another one just using wires.

Supplies Needed
- Wire (same as above)
- Box (same as above)
- Washers (not necessary but helpful)
- Cardboard
- Hot Glue Gun
- Scissors
How we went about it:
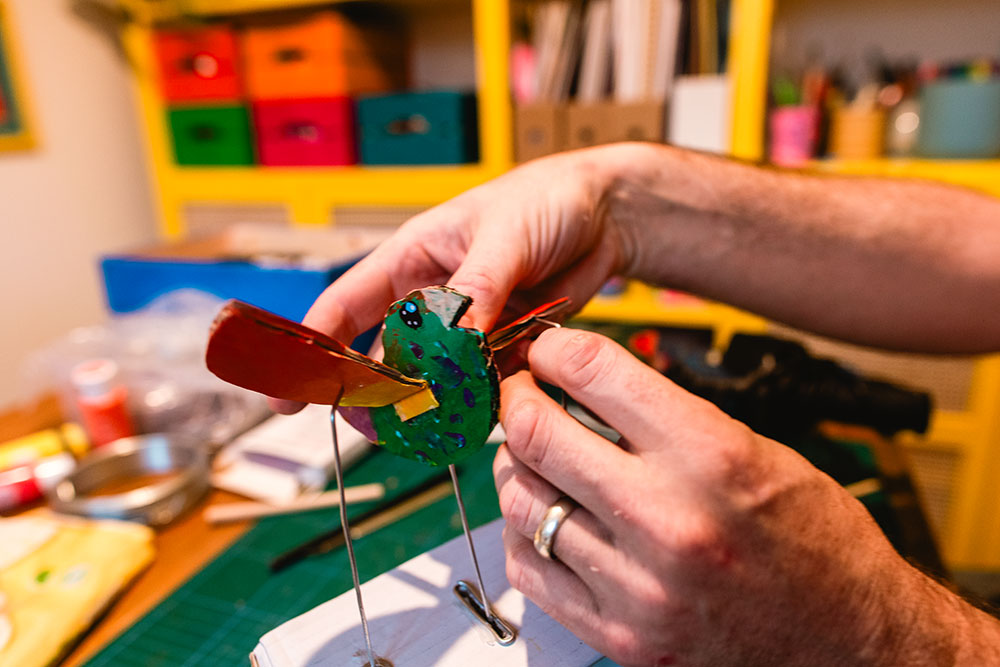
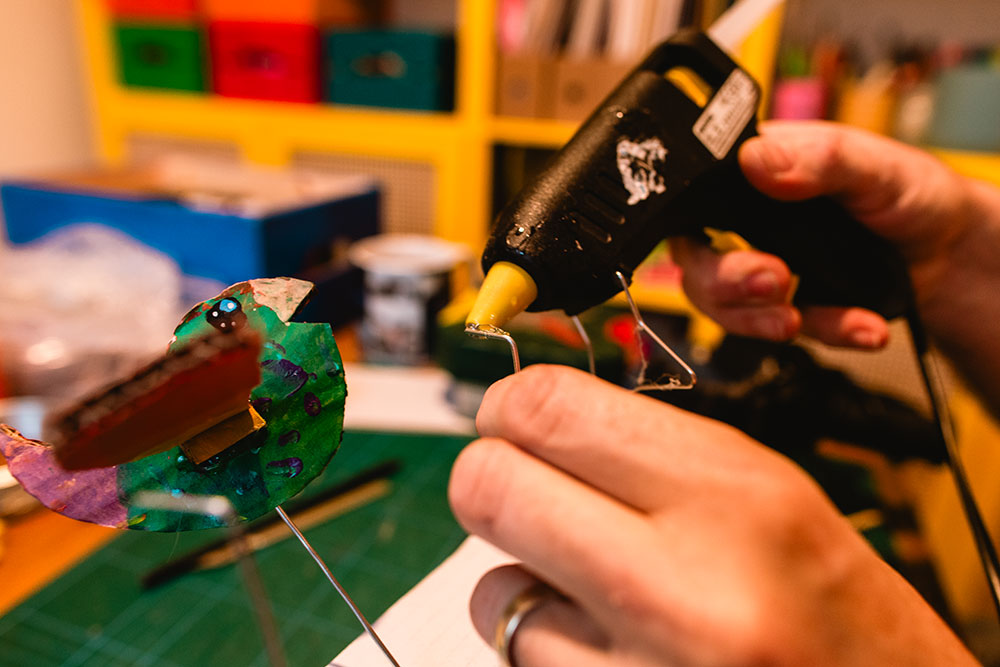
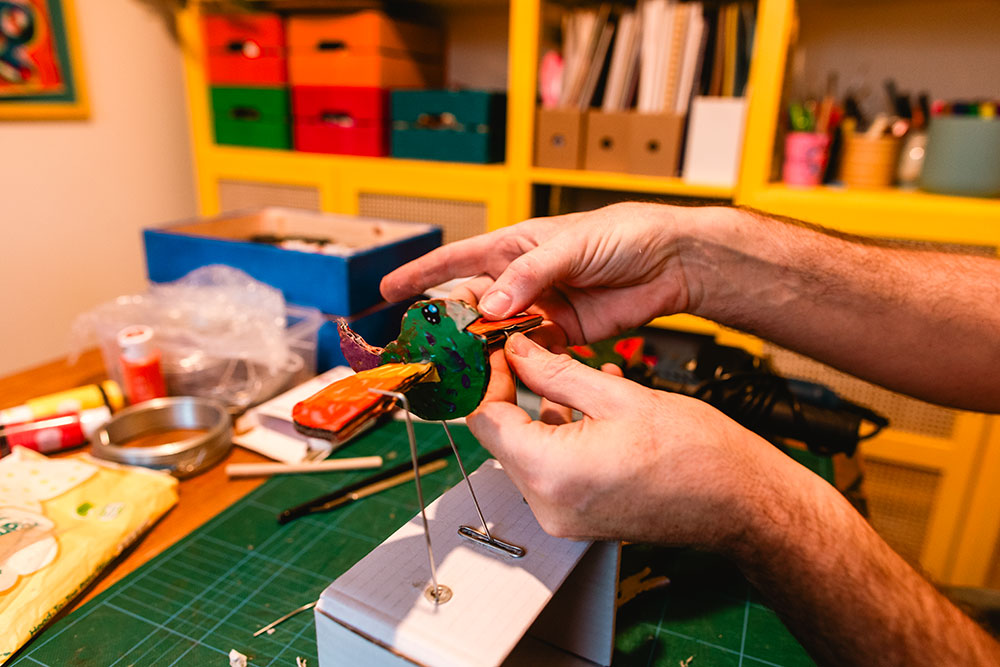
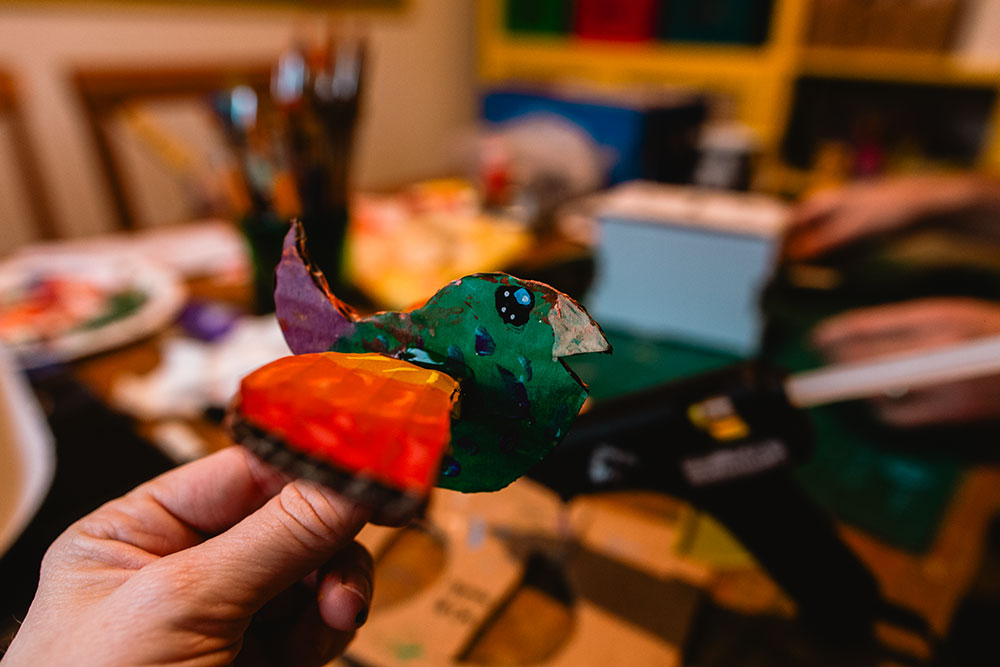
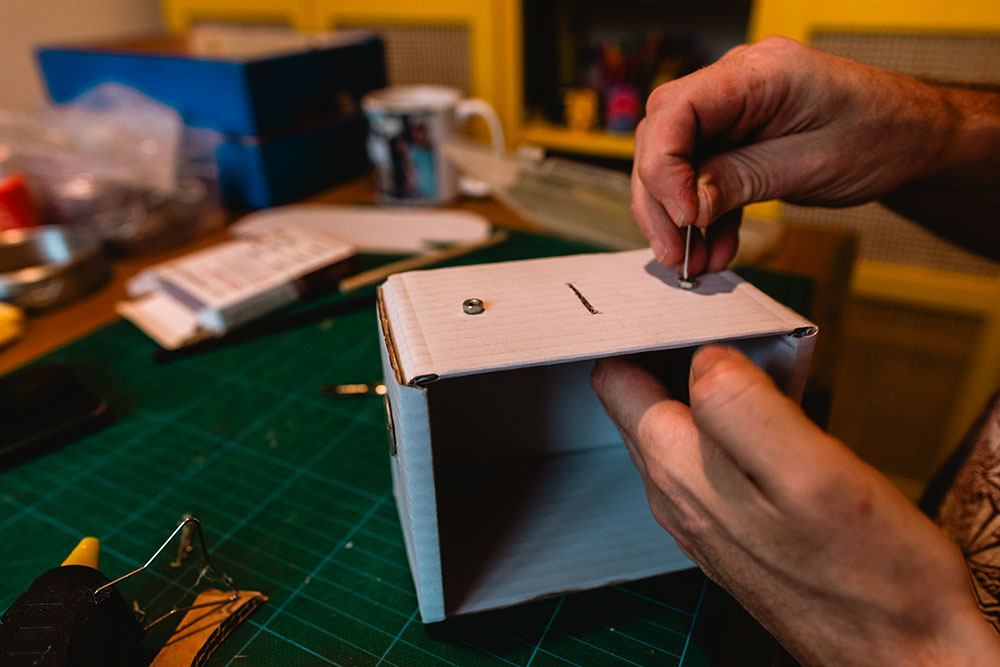
- First the kids made the bird. Nixie created the wings and Forrest created the body. Make sure the wings have about a cm edge that can be bent so it can be glued onto the body.
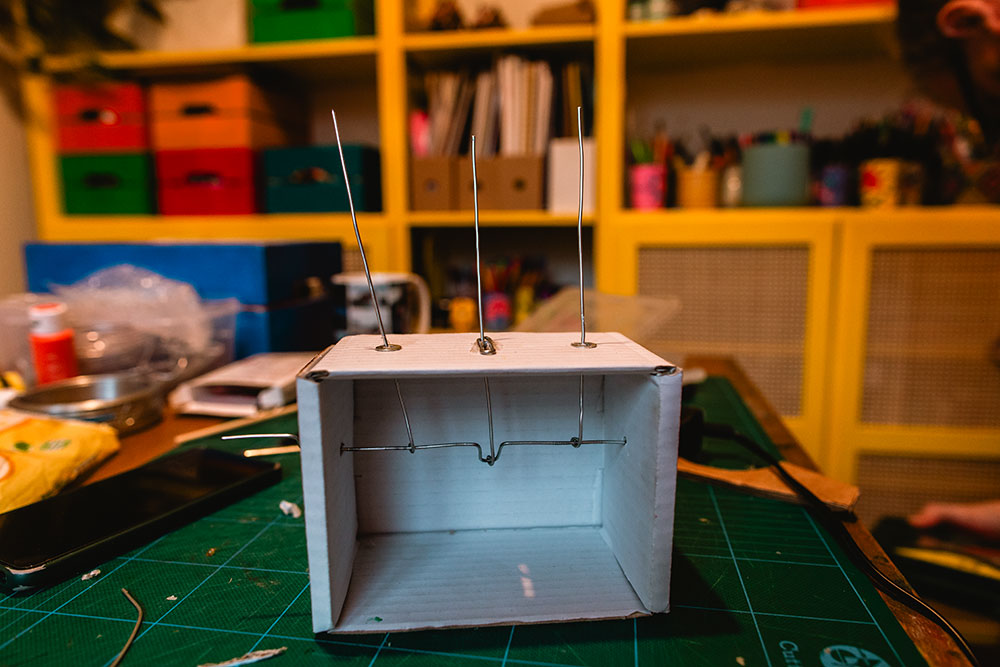
- Next cut three pieces of wire to approximately 16cm and bend your wire so that it looks similar to the one at the top in the photo below.
- Next make the holes in the top of your box and put washers around the holes (if you want to) and for the middle part make that a slit of about 3cm. We put a bit of wire around this and glued it on to stop the box from ripping. The two wires on the end don't move up and down, they just hold the wings in place while the body moves up and down.
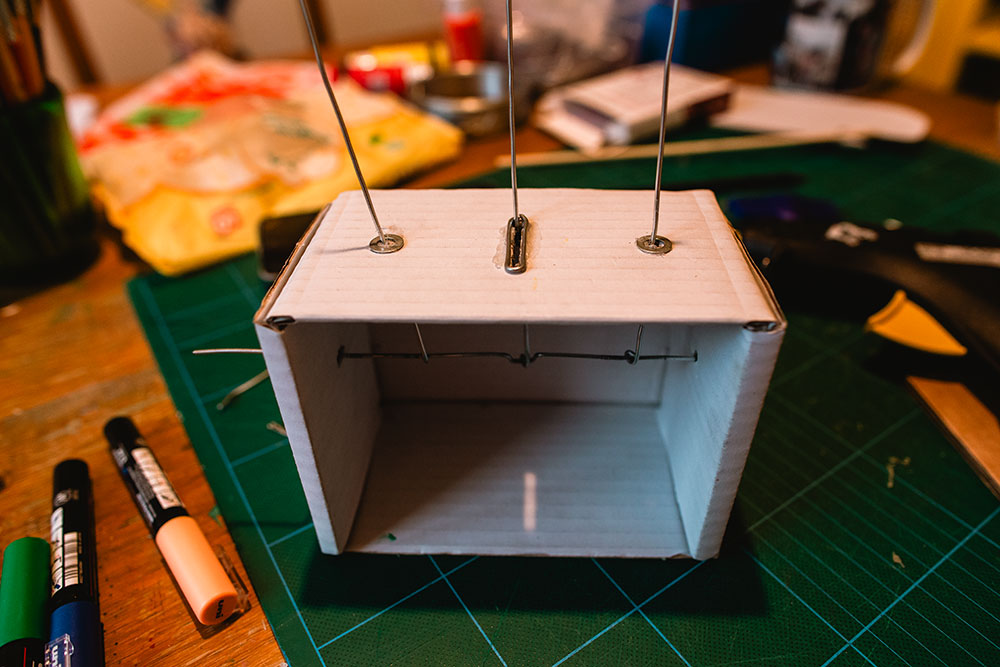
- Next, we added the birds by placing the wires in between the cardboard (this was a bit fiddly, we bent the wire that went into the wings). We added glue to make it more sturdy.